Ornamental Carved Stone Balls
Objects of admiration through the ages, petrospheres, or carved stone balls as they are more commonly known, have the power to delight, fascinate and cause heated arguments in equal measure! Recently, Caithness Broch Project commissioned Orcadian archaeologist and experimental prehistoric tool-maker Chris Gee to create a copy of two ornamental stone balls found in Caithness, to be used in outreach events with local communities and schools.
One such petrosphere was found in Thurso River. The ball, now found in Caithness Horizons, was originally preserved by one of Thurso's best known sons, Robert Dick, and Chris was kind enough to talk about his process in manufacturing a copy of such a special artefact...
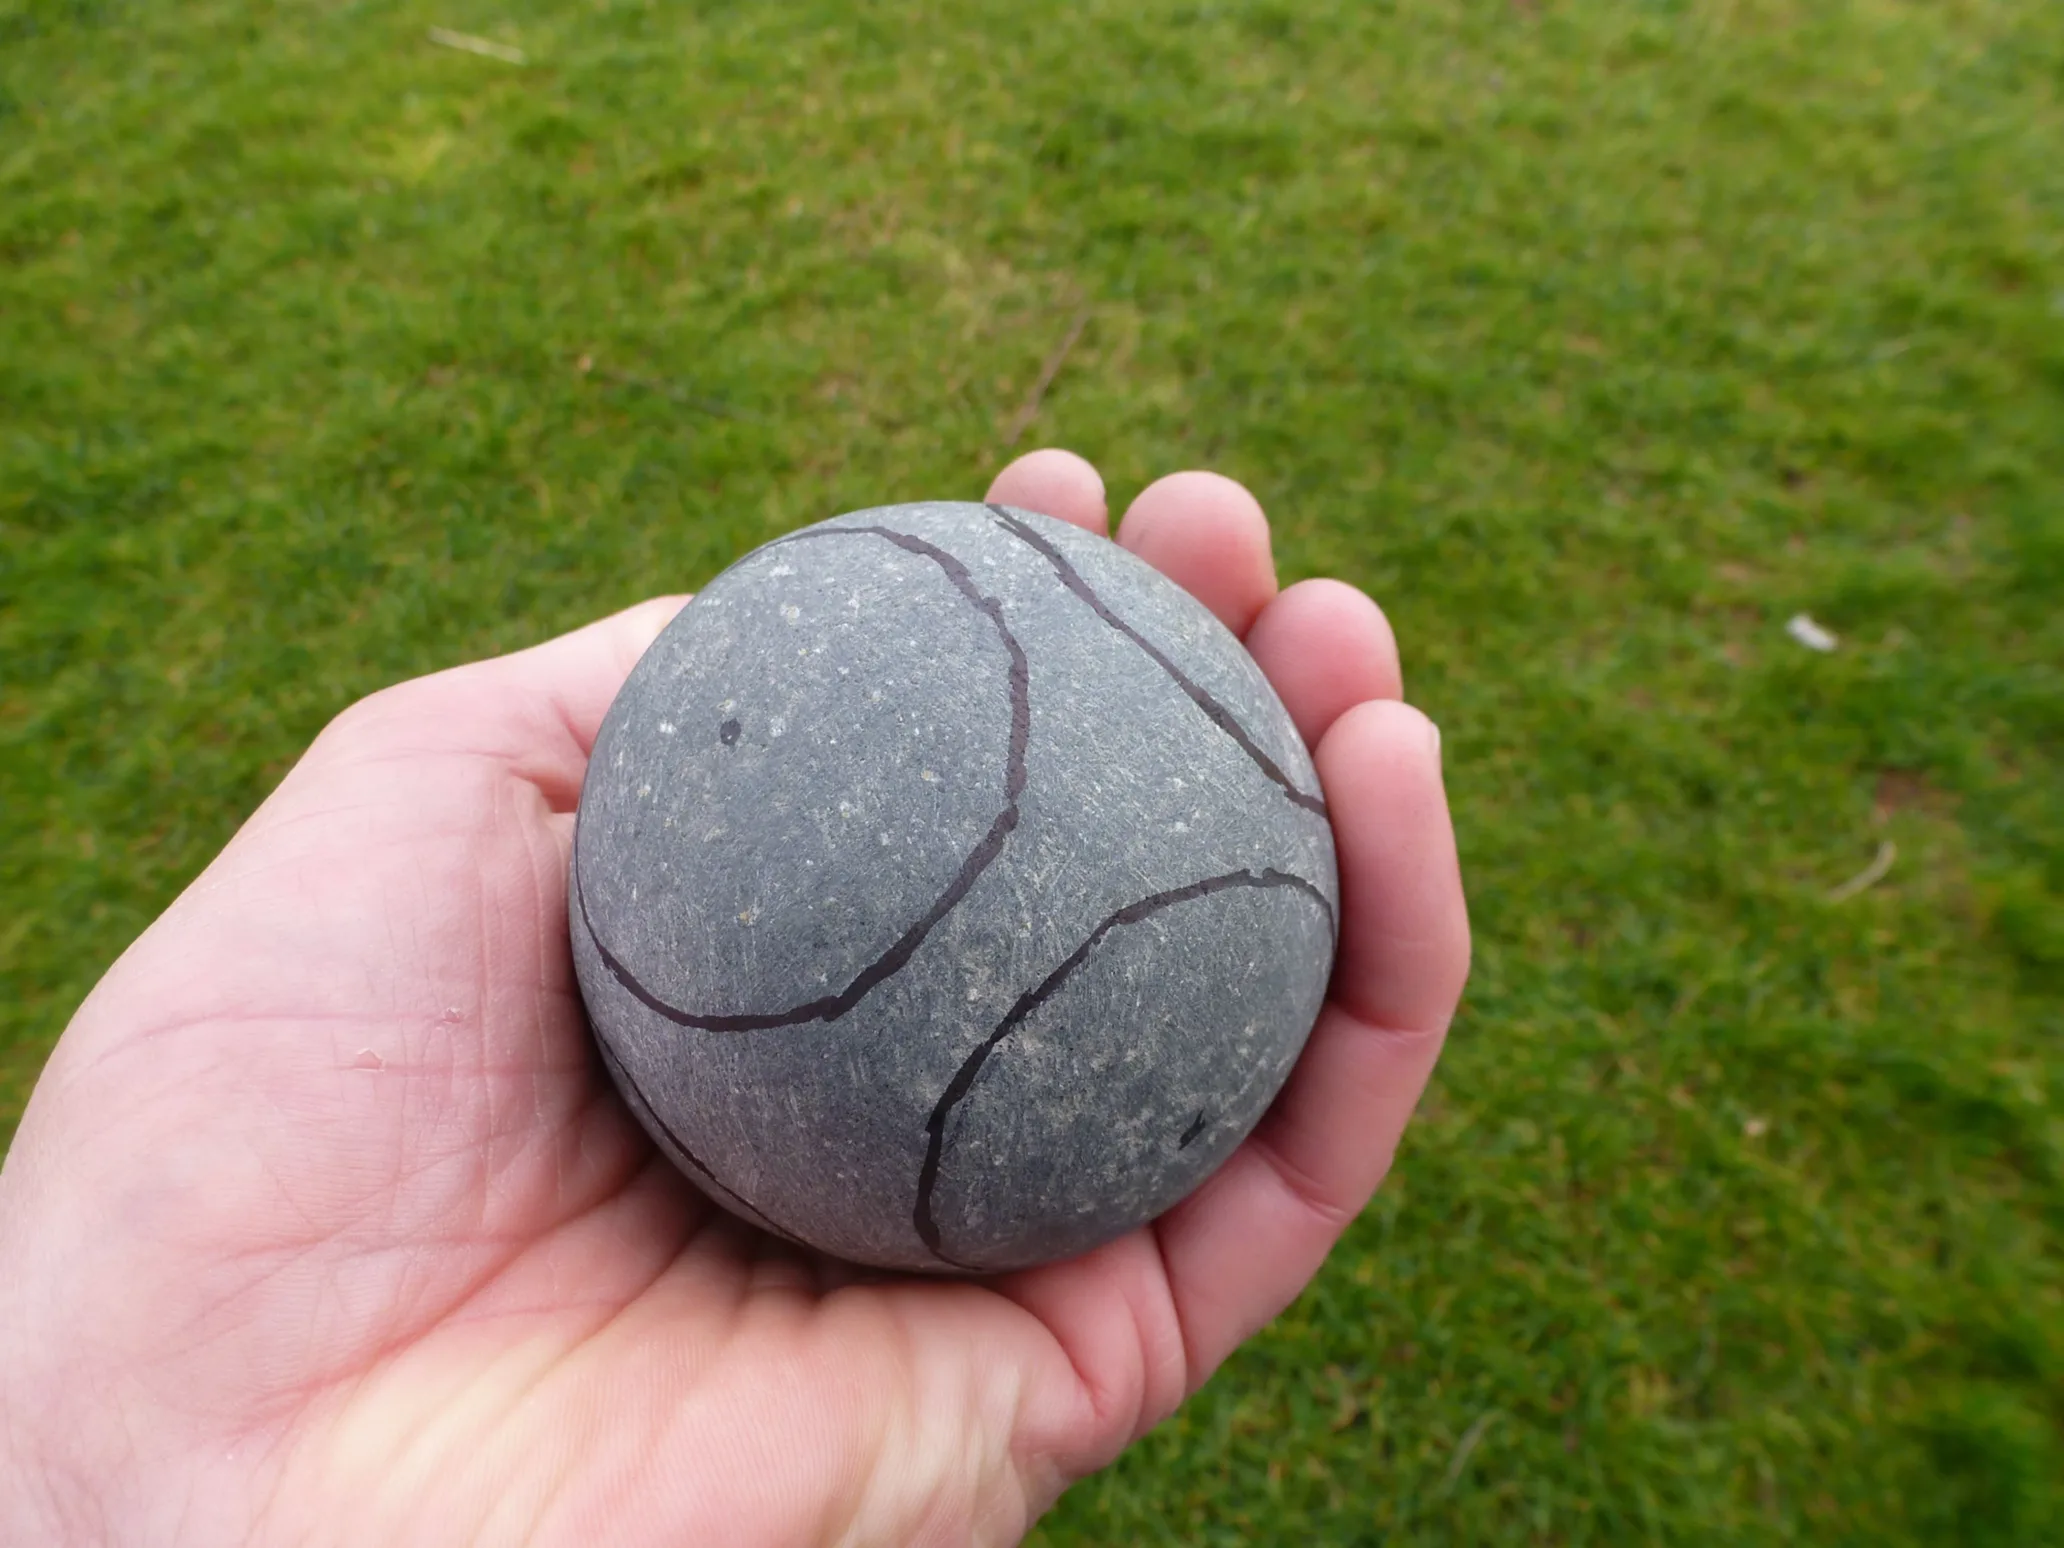
"This carved stone ball is a copy of the carved stone ball in Caithness Horizons that was found in the Thurso River. It is around the same size, shape and weight. The original seems to have been made from a volcanic rock possibly deriving from an intrusive igneous dyke, and that is what the copy is made from. The original was made in the late Neolithic, probably around 3000cal BC. It has six bosses arranged opposite each other as the faces upon a cube. Just over 425 carved stone balls are recorded, mainly all from Scotland, with a concentration in Aberdeenshire. Just less than half of the balls have six bosses arranged in this way (Marshall 1979).

Robert Dick (1811 - 1866), Thurso-based Geologist and Botanist
Although there is considerable variation in the number and form of bosses or discs they mostly all convey a sense of roundness (Barthelmess 2014, 3; Pattison 2012). It seems their starting point was usually the modification of a rock into a sphere. Some are more spherical than others though.
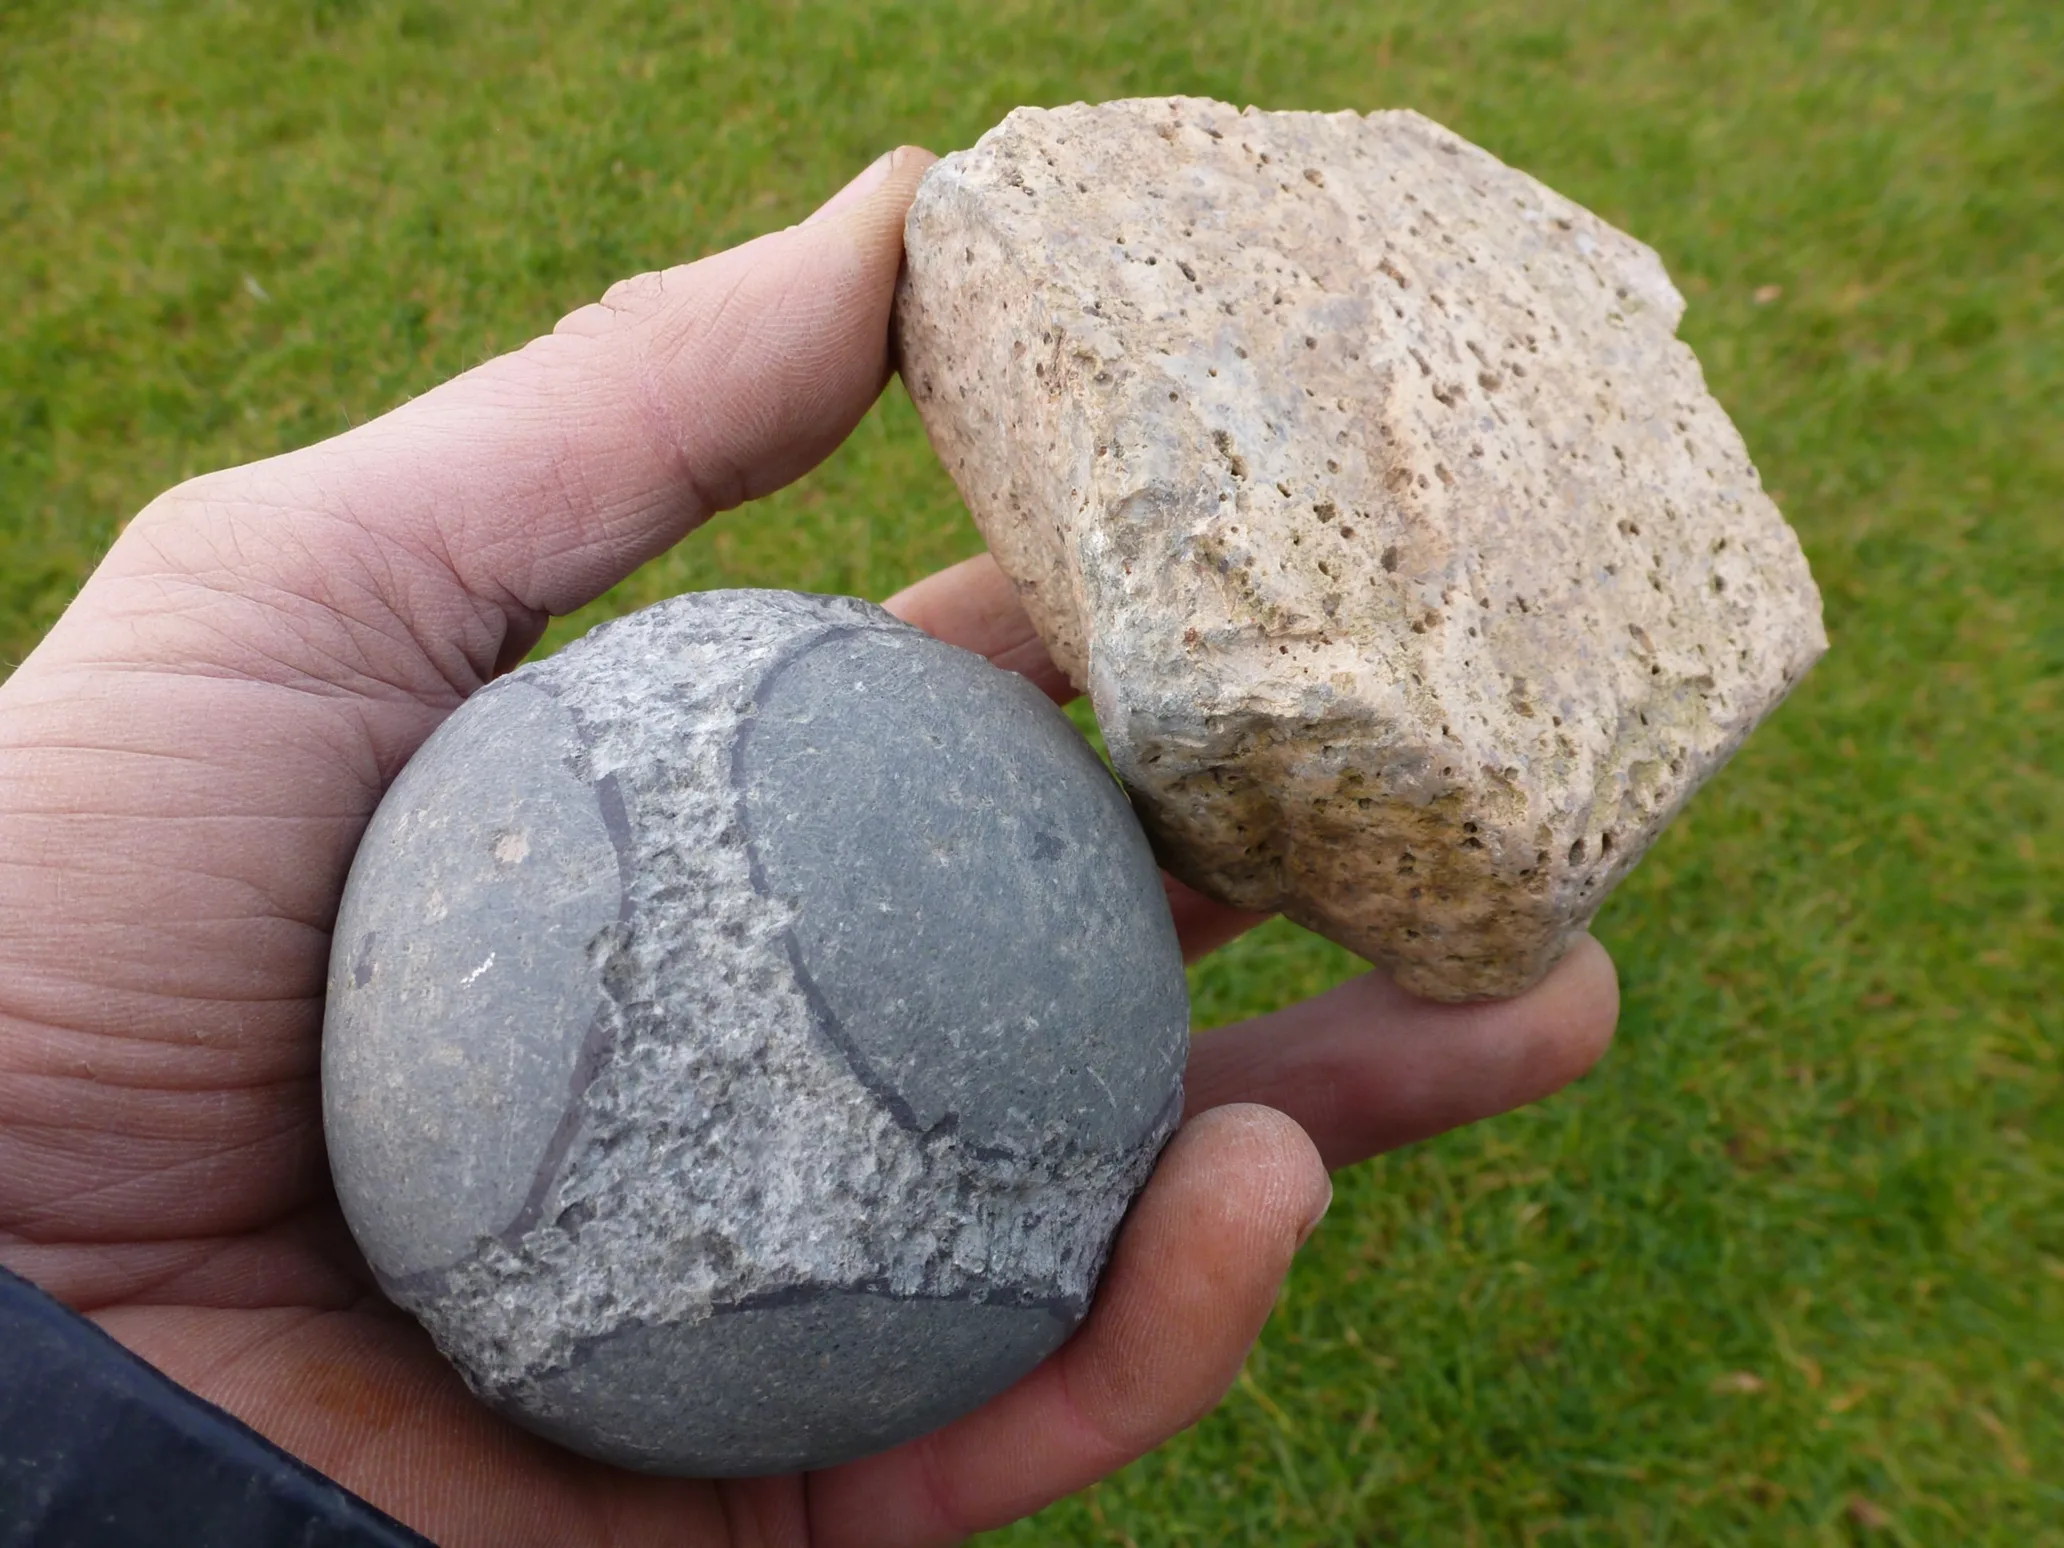
To create my primary sphere I begin by making a cube. It is fairly easy to make a cube by eye as it is possible to just use a stick or finger to check all sides are the right length. The next step is to mark the centre point of each face as a guide and reference point throughout the process. Again, this is easily done by eye but a bit of string folded works. I then peck the edges off the cube to form a polyhedron with all opposite faces the same distance apart and as parallel as possible.
The next stage is to peck down the remaining angles using three imaginary hoops at 90 degrees to each other. At this stage the ball looks like a paper bag that has been blown up. The corners now need to be chipped off while respecting the six original reference points and the three imaginary hoops. Most of the stages of shaping have so far involved chipping and pecking the stone to shape.
I use bits of broken quartz porphyry for pecking the stone to shape as it has a good weight, is very hard and always breaks to sharp corners. It is found outcropping at one location in Orkney and is also found as a hammer stone on Neolithic sites in Orkney. Throughout the process the ball is hit with the hammer stones thousands of times. Always for a few minutes at the start the hammer feels clumsy but soon it becomes part of the hand and now I know exactly where it will contact.
Chris 'pecking' the stone
Now that the sphere is made, mainly through pecking, this stage needs to be completed by smoothing out the rough pecked surface. The smoothed surface of the sphere will ultimately be the upper surfaces of the bosses when the ball is finished and is key to conveying the impression of overall roundness. Therefore, once the bosses are marked out on the surface their outer faces should undergo little if no more modification. The ball is smoothed by rubbing it with sandstone and water. Sandstone in Orkney (and Caithness), like sandpaper, comes in different grades and can be used accordingly.
The smoothing process
The Smoothed-out Ball
Now that the ball is spherical and smooth I mark out the position of the discs. Now comes the hard part mentally: breaking the surface of the lovely smooth ball by pecking and chipping the stone away between the bosses. This is also in some ways the most satisfying stage.
The tricky part...
Again, once the bosses look even and similar I finish them off by grinding away most of the pecking using shaped sandstone which I also have to keep grinding on another block of rougher sandstone. For this ball I round off the upper shoulder of the bosses to match its Neolithic sister.
The final stages...
It is possible to see and feel the remains of some of the pecking on the completed carved stone ball, particularly within the hollow between the bosses. Evidence of the subsequent shaping and grinding with sandstones can then been seen and felt as small scratches and striations, and small facets and angles where certain parts were ground down. Many Neolithic carved stone balls also show evidence of these same techniques and similar processes in their creation.
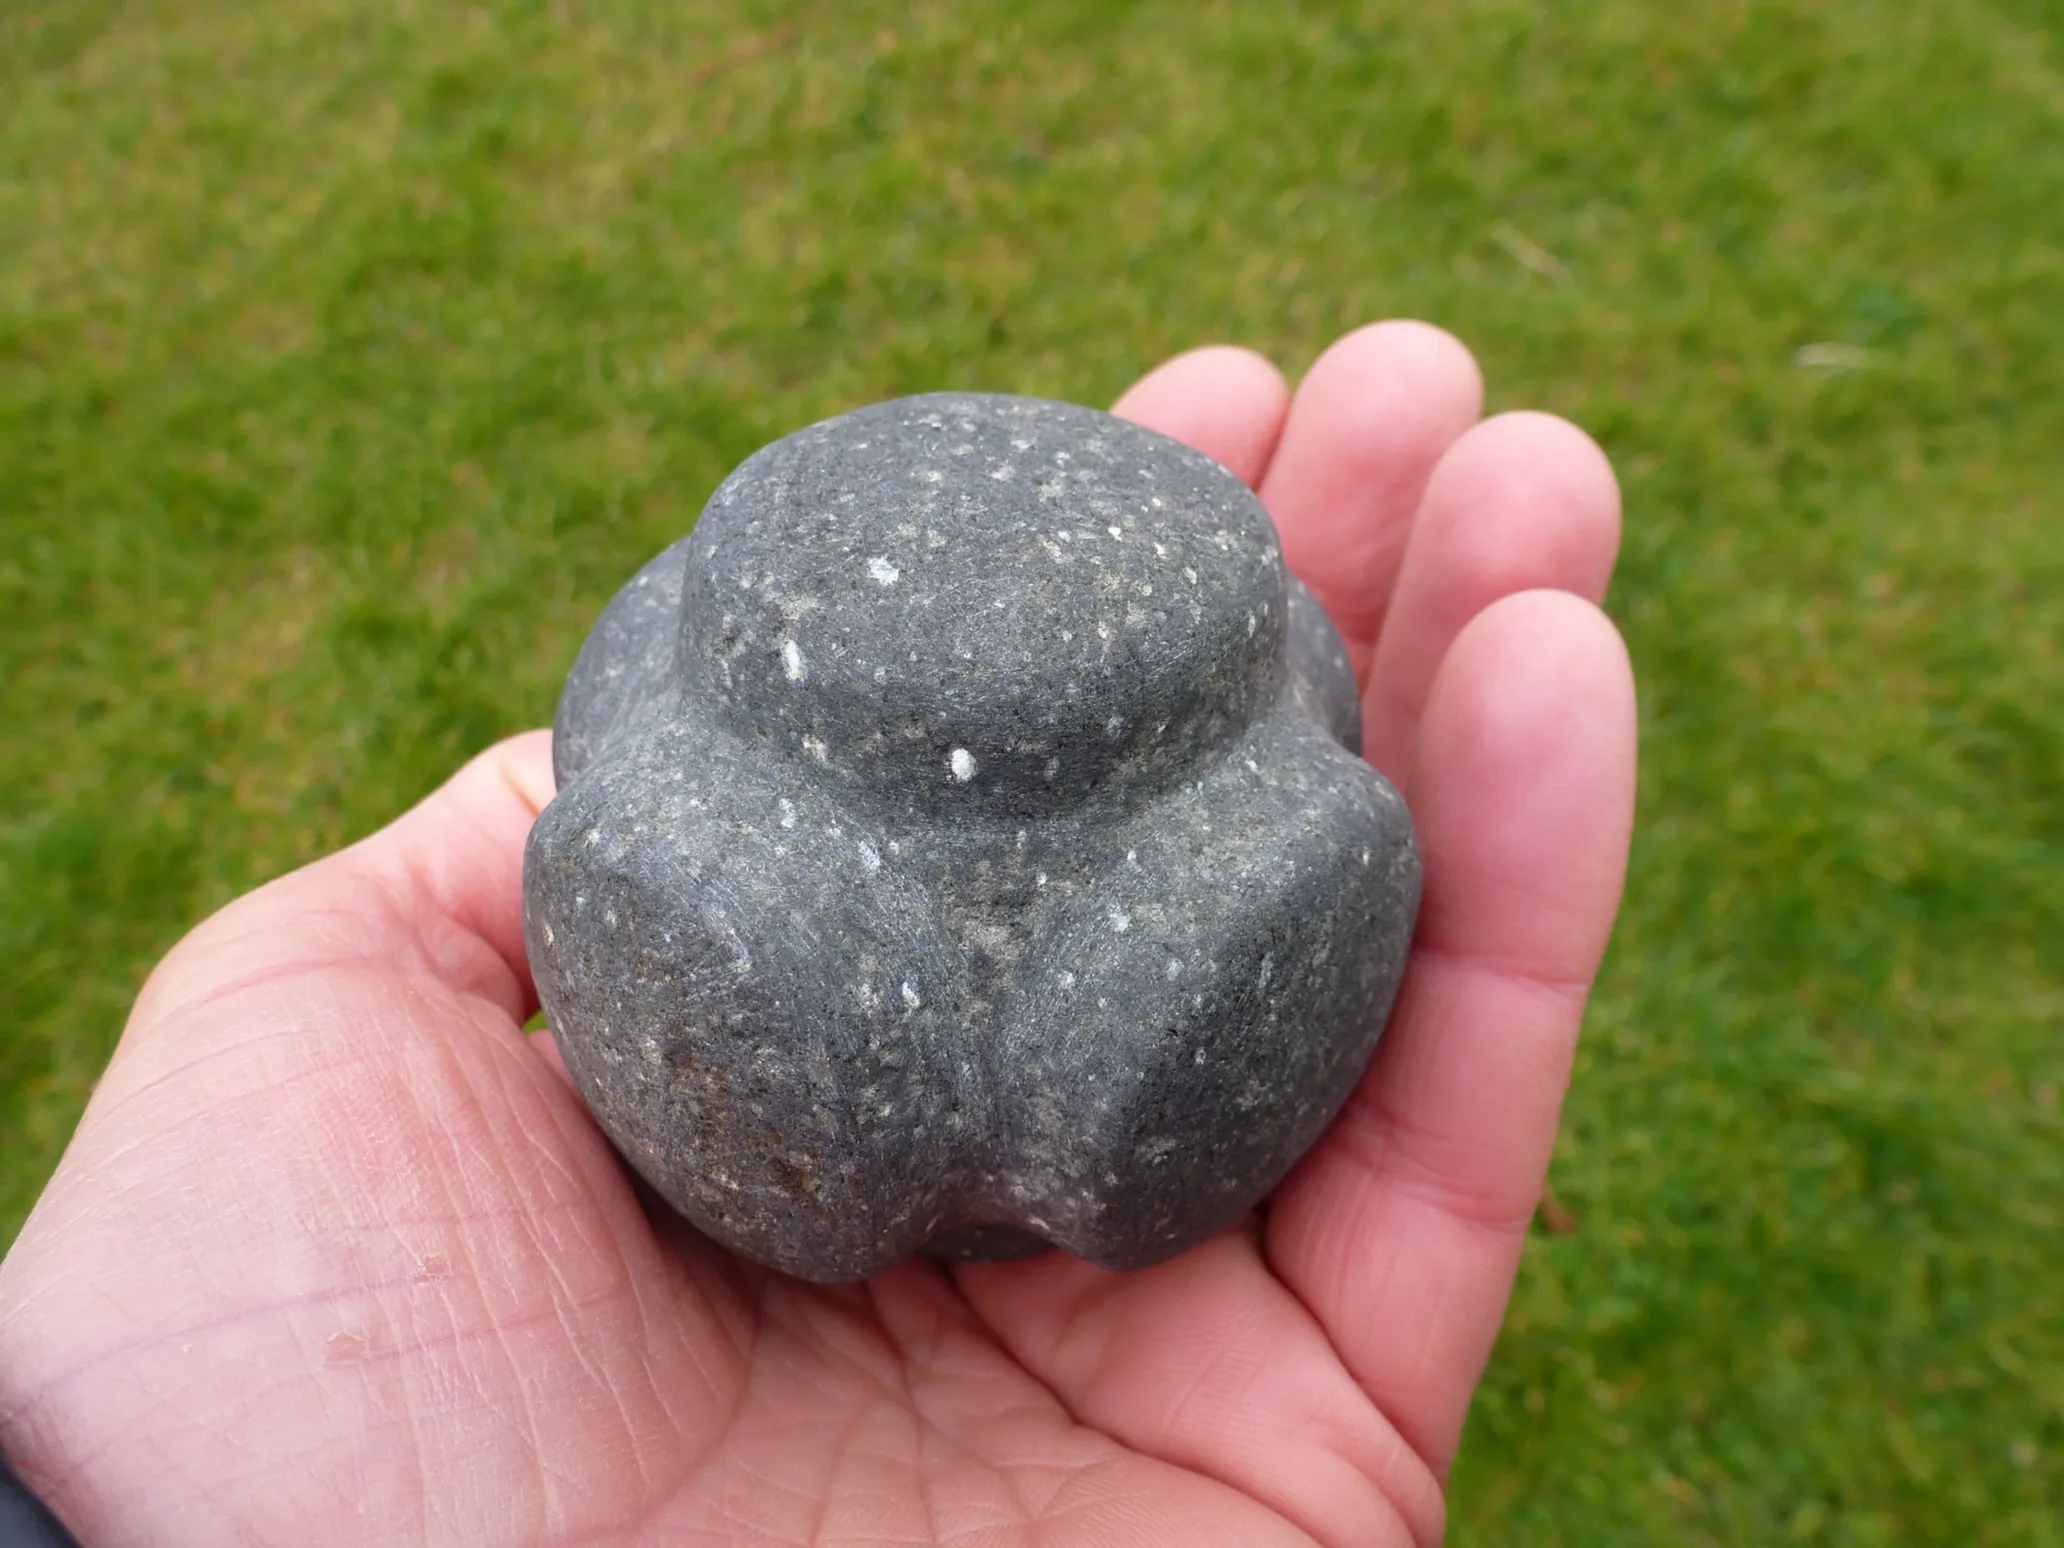
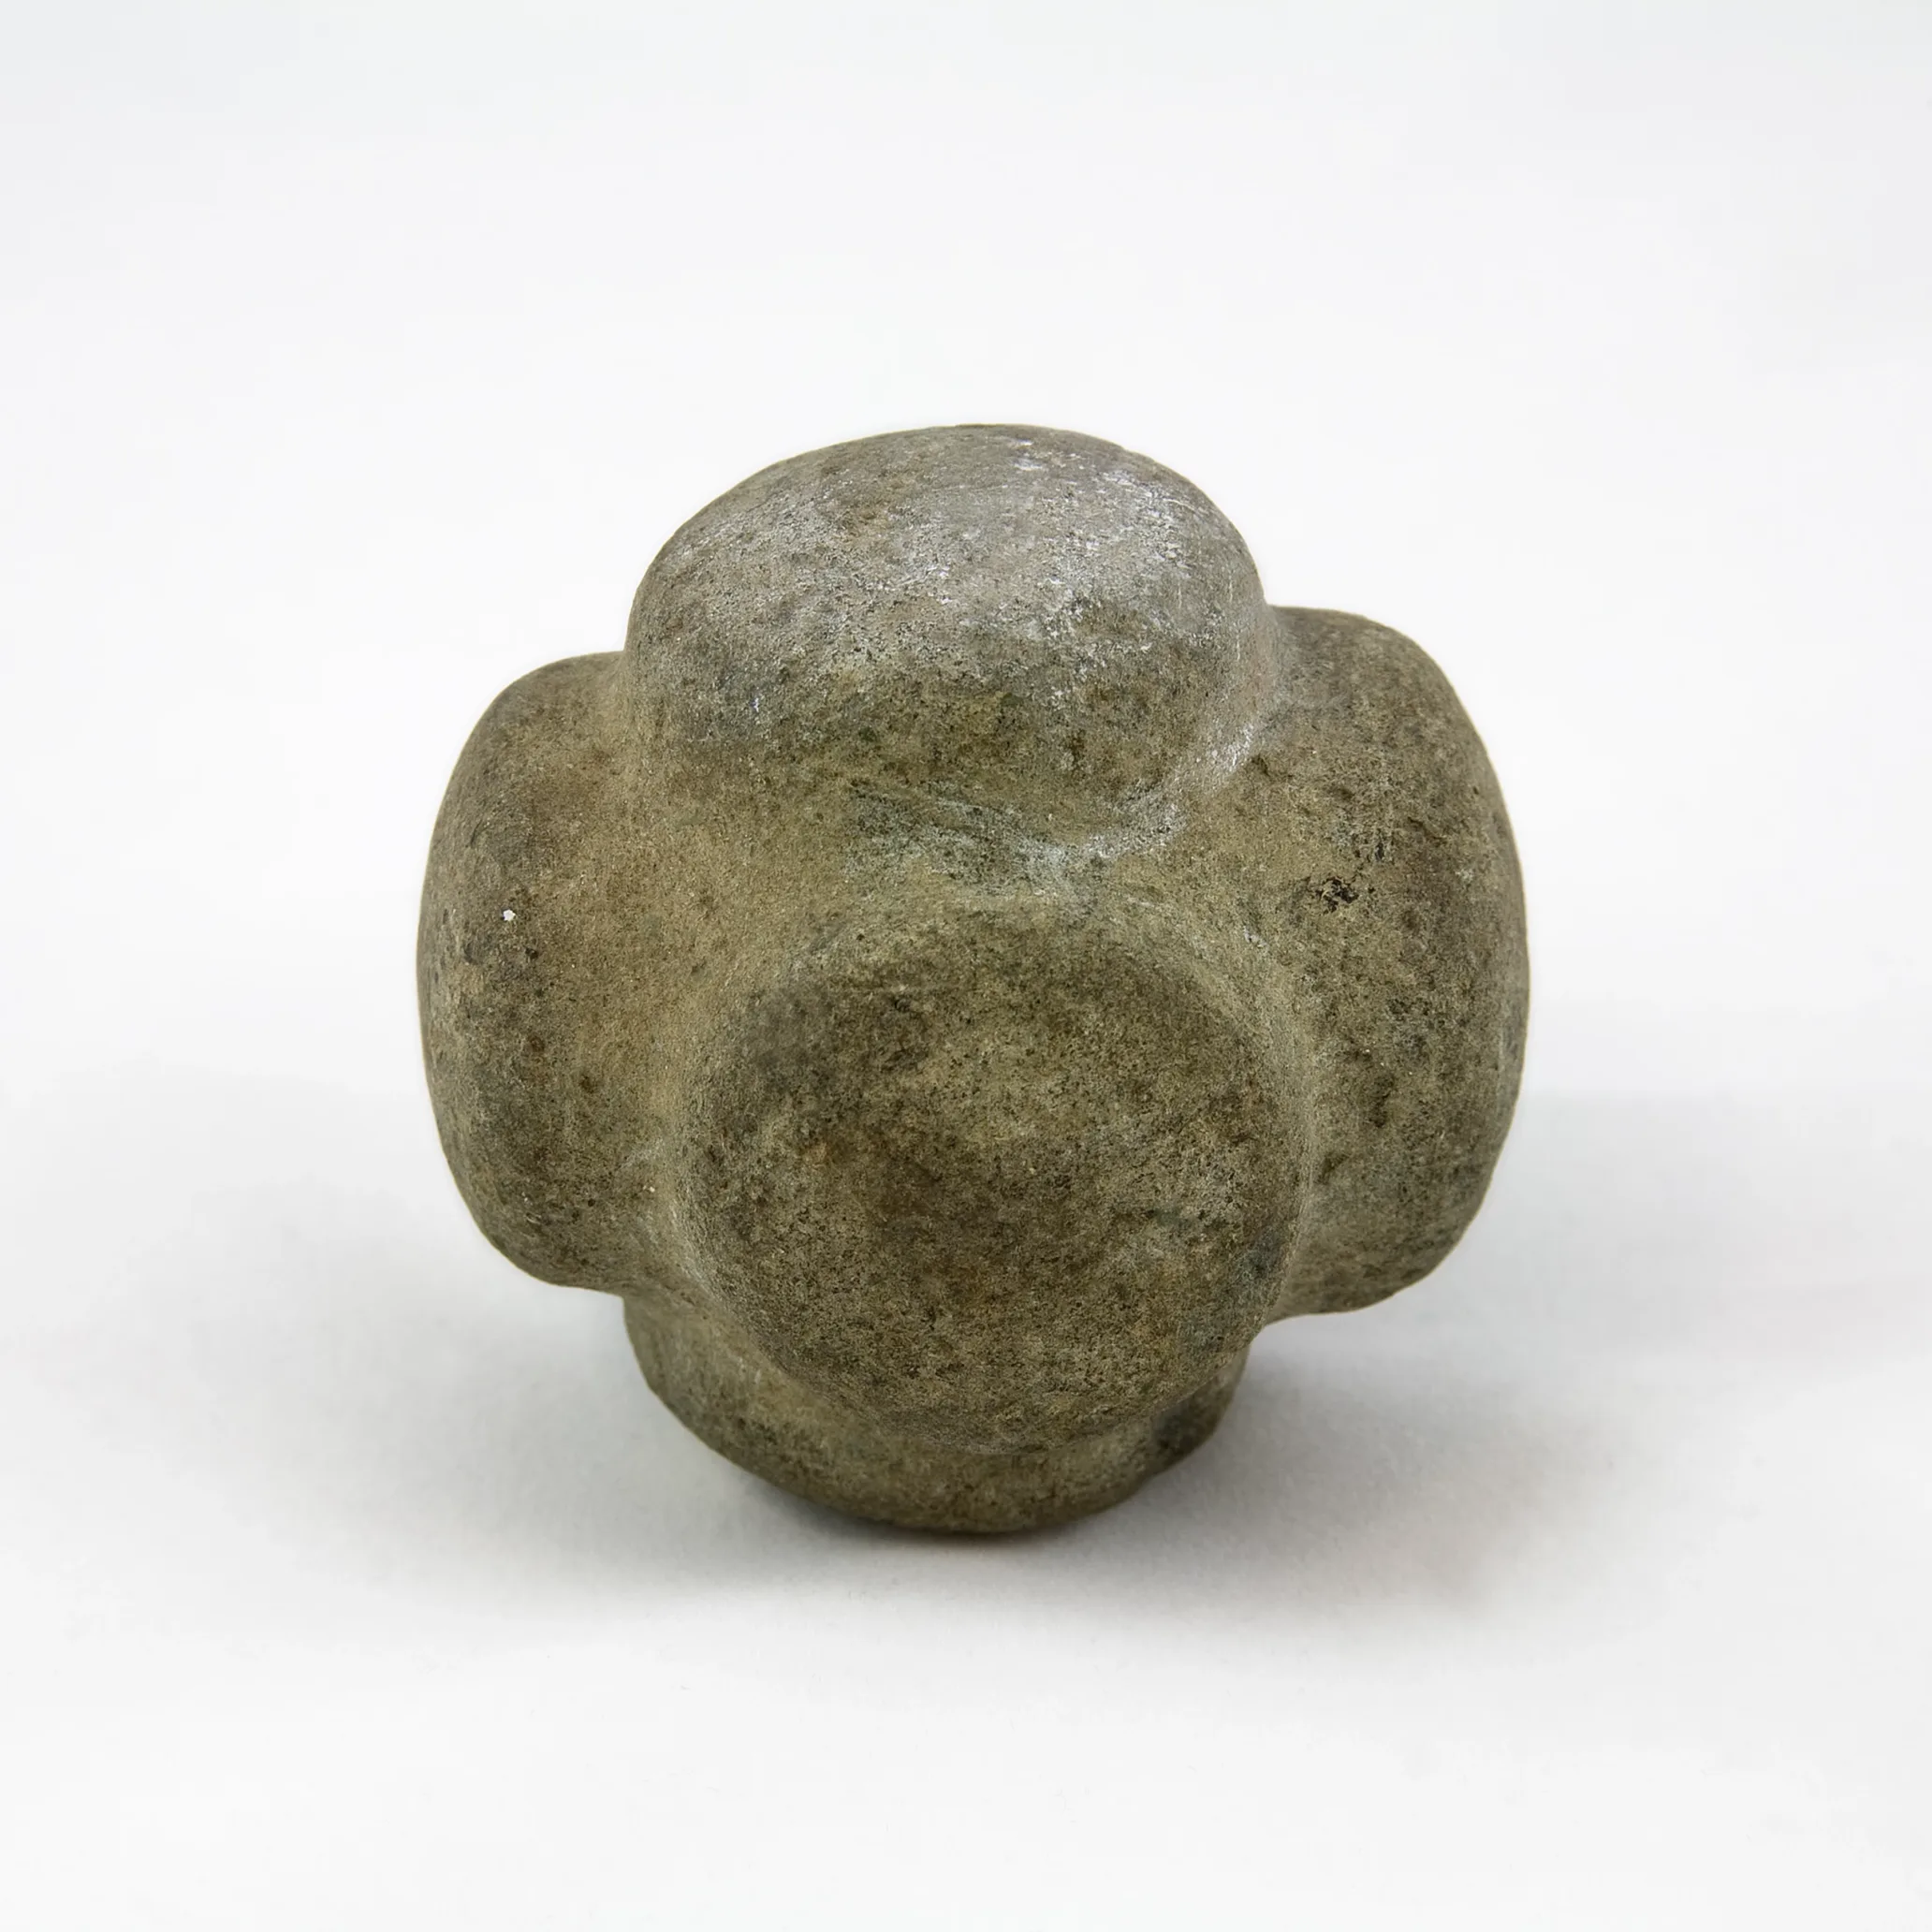
Voila! Above is Chris' creation, while below is the original. What do you think?
Bibliography
Barthelmess, B. 2014, A Neolithic Carved Stone Ball from the Ness of Brodgar, Orkney – Explored by and ‘Amature Archaeologist’, Unpublished paper
Marshall, D.N. 1979, “Carved Stone Balls”, in Proceedings of the Society of Antiquaries of Scotland, Vol 108, 1976-77, 40-72
Pattison, J. 2012, Models of Mind: Carved Stone Balls from the Islands of Scotland, Taigh Chearsabhagh Museum and Arts Centre